You’ll have a lot of configuration data for every Infrastructure-as-Code tool, including Azure Bicep, Terraform, etc. Whether it’s the name of the resource you’re creating, the size, the SKU, and everything in between. Because of that, you’ll need a place to store said configuration data without being spread across environment variable files throughout source control, creating yet another file for engineers to manage.
In this blog post, you’ll learn how to create Azure Bicep templates with CloudTruth for a far better deployment experience.
Setting Up Bicep
Before creating a Bicep configuration, you’ll need to set up Bicep and the necessary tooling on your computer.
There are a few methods to install Bicep, and you’ll see two of the primary ways.
To install Bicep on MacOS, you can use Homebrew:
brew tap azure/bicep
brew install bicep

For all other operating system installation methods, check out the following link: https://learn.microsoft.com/en-us/azure/azure-resource-manager/bicep/install?tabs=azure-powershell#macos
You can also install Bicep via the Azure CLI, which is most likely a better method as the same method works across all operating systems.
az bicep install
To check that Bicep is installed, run the following:
bicep –version
OR
az bicep version
# Output
Bicep CLI version 0.11.1 (030248df55)
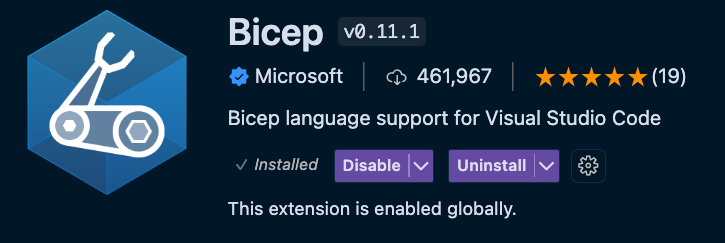
Next, you’ll need a place to write the Bicep code. The perfect editor due to its Bicep extension is VS Code. If you don’t already have VS Code installed, you can do so here.
Open up VS Code and search for bicep, then install it.
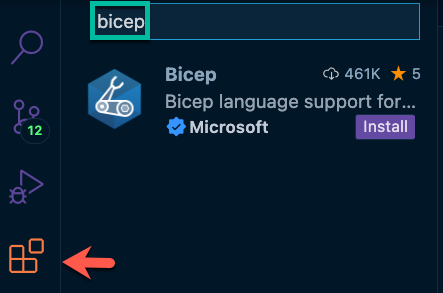
Once installed, you’ll get all of the extension’s benefits, including validation and IntelliSense.
In the next section, you will learn how to set up an Azure Bicep template for Azure Kubernetes Service (AKS).
The Bicep Config
Now that Bicep is installed and configured on your computer let’s look at a Bicep configuration that you can use to deploy an AKS cluster.
Let’s break it down piece by piece.
First, you specify the parameter names and the parameter type. The parameter names will be the same names used when creating parameters in CloudTruth.
param location string
param clusterName stringparam nodeCount int
param vmSize string
Next, you can start defining the resource. The resource API used for AKS is Microsoft.ContainerService/managedClusters@2021-05-01.
resource aks 'Microsoft.ContainerService/managedClusters@2021-05-01' = {
  name: clusterName
  location: location
  identity: {
    type: 'SystemAssigned'
  }
The last piece of the code is the properties and add-ons for your AKS cluster.
properties: {
    dnsPrefix: clusterName
    enableRBAC: true
    agentPoolProfiles: [
      {
        name: '${clusterName}1'
        count: nodeCount
        vmSize: vmSize
        mode: 'System'
      }
    ]
  }
}
Putting it all together, you get the following:
param location string
param clusterName string
param nodeCount int
param vmSize string
resource aks 'Microsoft.ContainerService/managedClusters@2021-05-01' = {
  name: clusterName
  location: location
  identity: {
    type: 'SystemAssigned'
  }
  properties: {
    dnsPrefix: clusterName
    enableRBAC: true
    agentPoolProfiles: [
      {
        name: {clusterName}-1
        count: nodeCount
        vmSize: vmSize
        mode: 'System'
      }
    ]
  }
}
Now that the Bicep configuration is complete let’s look at the CloudTruth config.
CloudTruth Config
In the previous section, you identified four parameters:
- clusterName
- location
- nodeCount
- vmSize
To obtain values for those parameters, you’ll need to create the values in CloudTruth.
Create a CloudTruth project called Bicep where the parameters will exist.
You can use the UI to create parameters, but using the CLI is the fastest method.
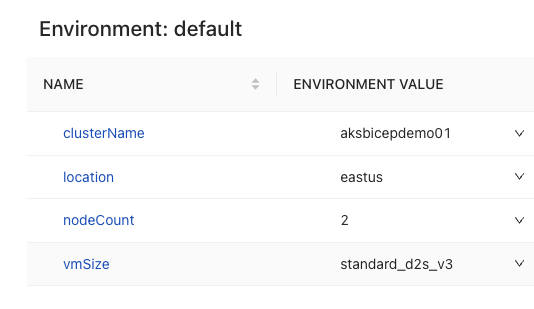
cloudtruth –project bicep parameter set –value aksbicepdemo01 clusterName
cloudtruth –project bicep parameter set –value eastus location
cloudtruth –project bicep parameter set –value nodeCount 2
cloudtruth –project bicep parameter set –value vmSize standard_d2s_v3
Once all parameters are added, you should see an output similar to the screenshot below in the CloudTruth UI.
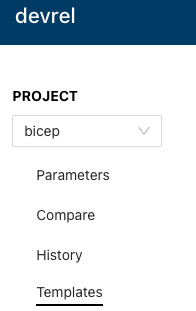
Next, under the bicep project, go to Templates.
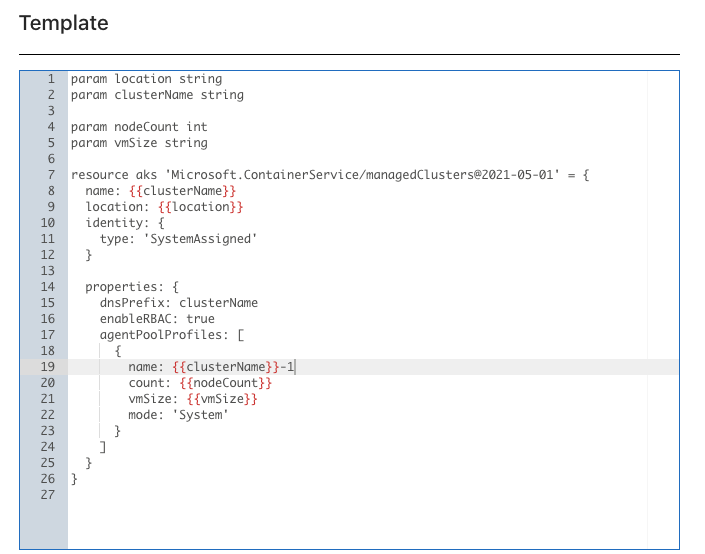
Create a new template called aks.bicep.
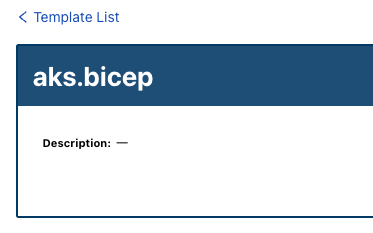
Copy the Bicep configuration from the previous section and add it into the Template section in CloudTruth. Ensure that you specify the brackets {{ }} around the CloudTruth parameters as shown in the screenshot below.
Once saved, you’ll see the values propagate into the template’s output.
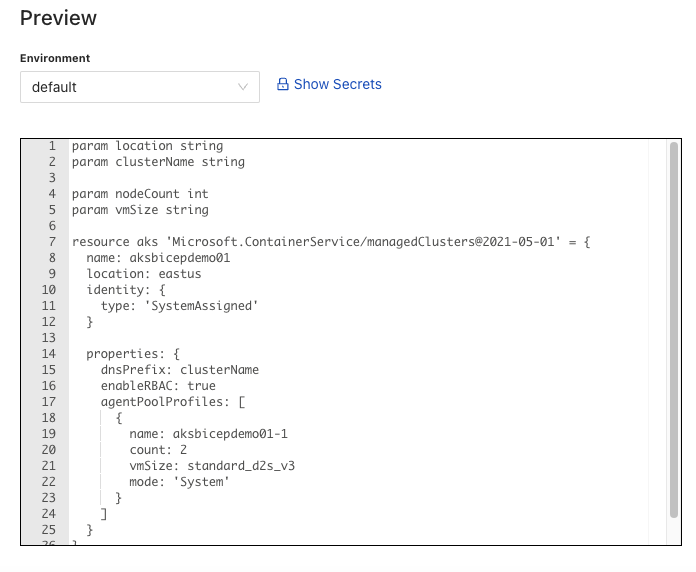
You can now see that the template was created for you with the values.
Congrats! You have successfully created an Azure Bicep template and utilized CloudTruth to pass in the parameter values.
Retrieving the Template
In the previous section, you saw how the CloudTruth Template ingested parameters for each environment. Now that you know the created parameters can exist in the template for each environment, you can retrieve the Template for each environment.
Using the CloudTruth CLI, you can specify your CloudTruth Project and Template. You can then output the bicep file to a directory location of your choosing.
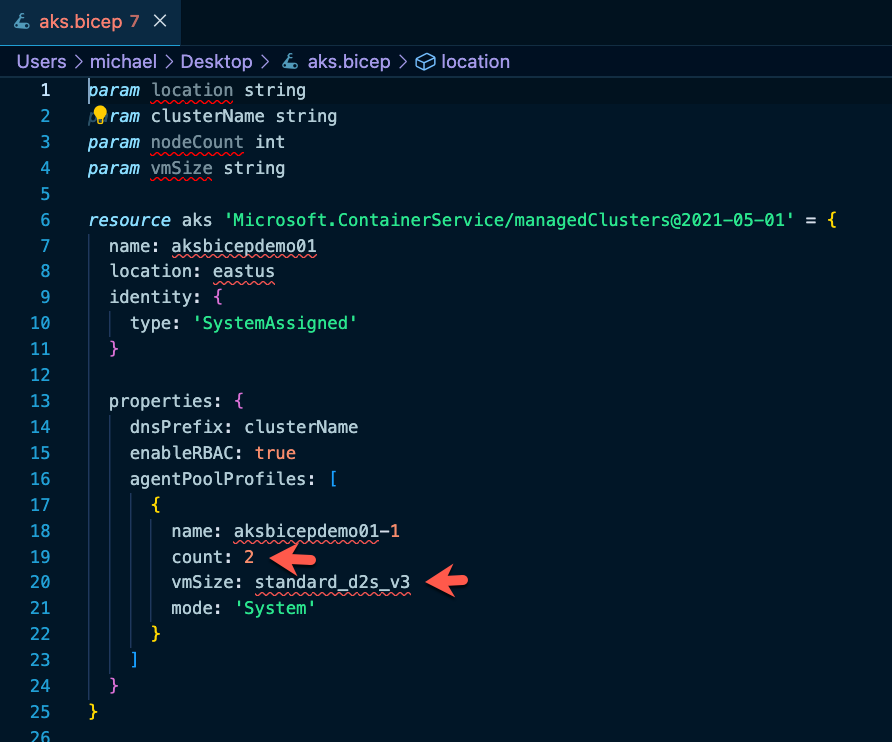
cloudtruth –project bicep –env development template get aks.bicep >> aks.bicep
Opening the aks.bicep configuration, you should see an output similar to the screenshot below.
Finally, you can deploy the Azure Bicep configuration. To deploy Bicep, there are a few different methods. The primary method is by using the Azure CLI.
az deployment group create \
  --name akscluster01 \
  --resource-group cloudtruth \
  --template-file aks.bicep \
  --parameters location='eastus'
Congrats! You have successfully created an Azure Bicep template and utilized CloudTruth to pass in the parameter values and retrieve a template for deployment based on a particular environment.
Here’s a screencast that walks through the process:

Join ‘The Pipeline’
Our bite-sized newsletter with DevSecOps industry tips and security alerts to increase pipeline velocity and system security.