As an Application Developer or DevOps engineer, you'll most likely find yourself attempting to manage, learn, and use multiple different CLI tools. Whether it's to interact with cloud services, virtualized services, or any other API endpoint for the platform you're working with. To make things easier, you may want to configure containers that have the ability to do the work for you.
In this blog post, you'll learn about how CloudTruths Docker integration can help you save time from running a bunch of CLI commands and instead have containers that can automatically do the work for you.
Docker Container Code
To run a Docker container, you must first build a Docker image. The Docker image that you'll need to run the CloudTruth CLI is actually incredibly simple.
First, you'll start with the container base image. To keep the container footprint as small as possible, you can usealpine.
FROM alpine
Next, you'll have to install the latest version of the CloudTruth CLI. The command below runs a curl to confirm a connection and a proper path to the CloudTruth CLI, followed by running a wget to download it followed by running the install.sh script to install the CloudTruth CLI.
RUN (curl -sL https://github.com/cloudtruth/cloudtruth-cli/releases/latest/download/install.sh || wget -qO- https://github.com/cloudtruth/cloudtruth-cli/releases/latest/download/install.sh) | sh
The last step in the Dockerfile is to add in any CloudTruth CLI command you want. For example, in the CMD section below, you'll see that the CloudTruth CLI command is to list out Projects. In short, this container image if you leave the command below can be used to list out all of your CloudTruth projects. Every time you run this container image, the output will be a list of Projects.
CMD ["cloudtruth", "project", "list"]
Putting it all together, the entire Dockerfile will look like the below code:
FROM alpine
# Install the CloudTruth CLI
RUN (curl -sL https://github.com/cloudtruth/cloudtruth-cli/releases/latest/download/install.sh || wget -qO- https://github.com/cloudtruth/cloudtruth-cli/releases/latest/download/install.sh) | sh
CMD ["cloudtruth", "project", "list"]
Building and Testing The Docker Container
Now that the Dockerfile is created, you have to billed the container image off of the Dockerfile. First, change directory (cd) to where the Dockerfile exists.
cd path_to_dockerfile
Next, run the docker build command with the -t switch to tag the image with whatever name you'd like. The . tells the command-line that the Dockerfile is in the current directory.
docker build -t lightweightct .
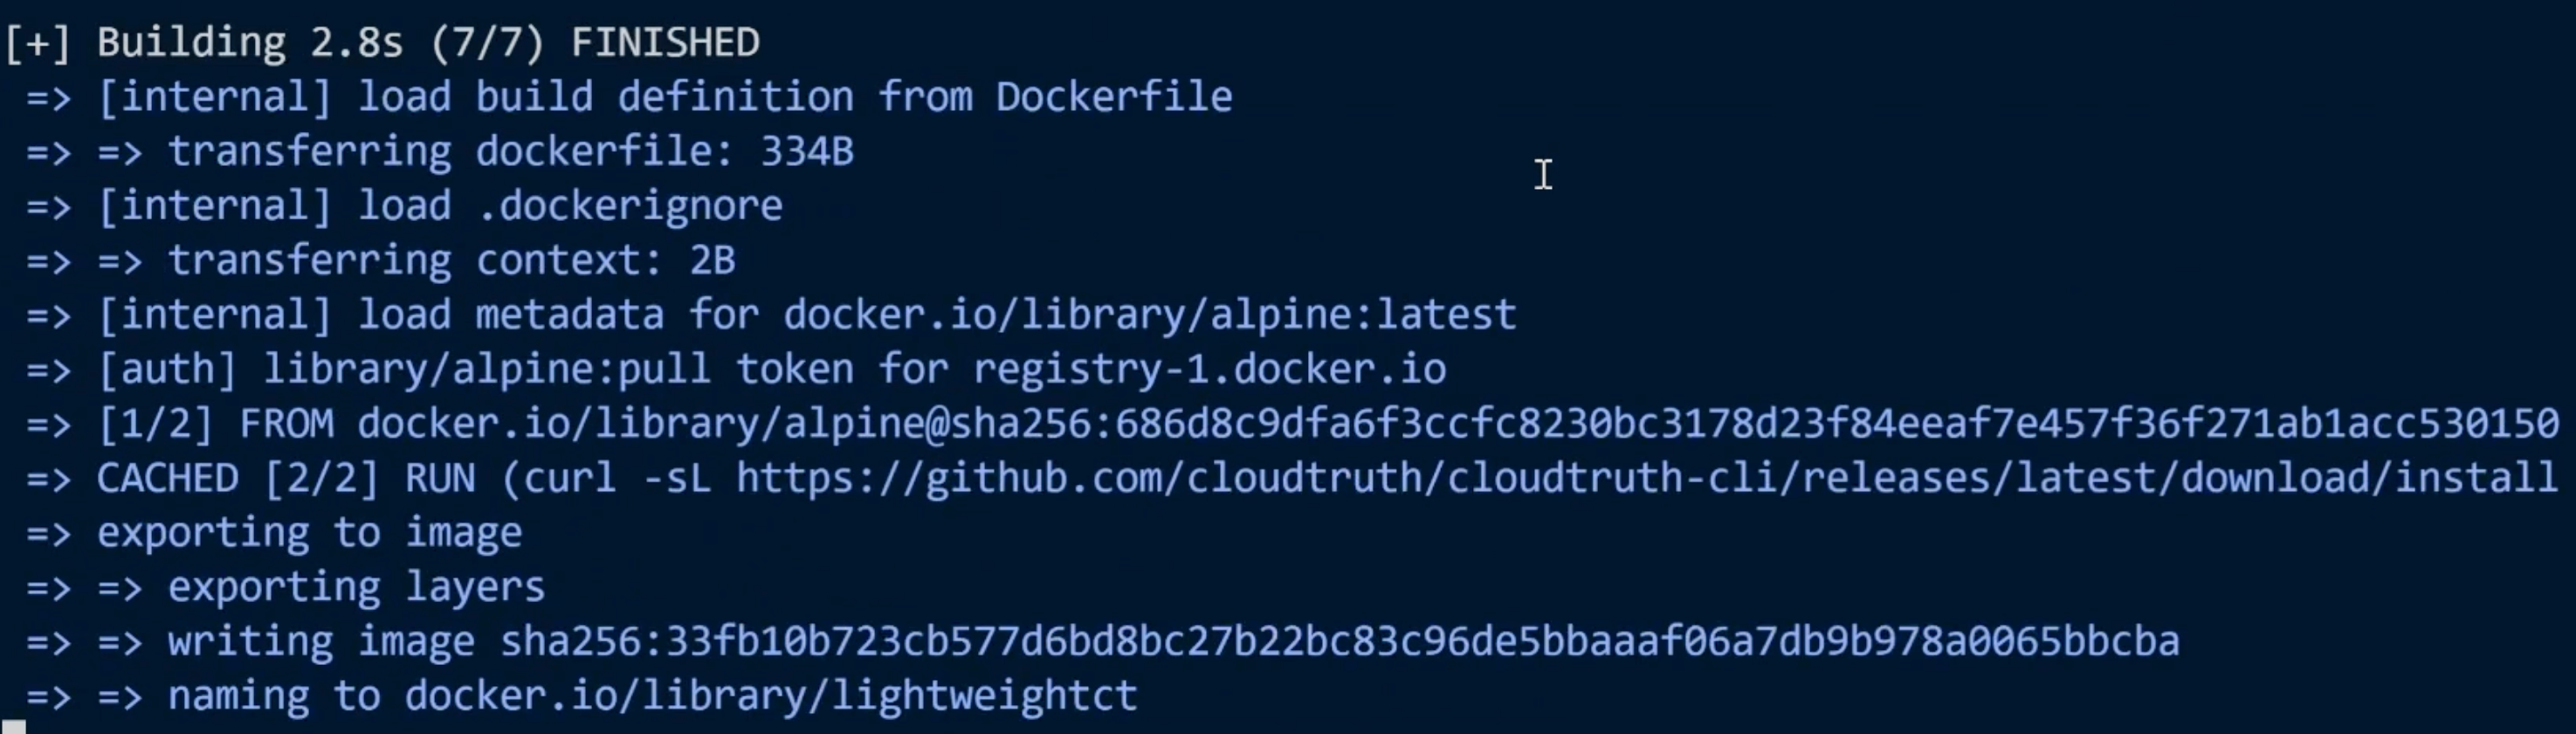
After running the docker build command, you'll see an output similar to the screenshot below.
Next, run the container that will output the CloudTruth project list.
docker run -it --rm -e CLOUDTRUTH_API_KEY="" lightweightct
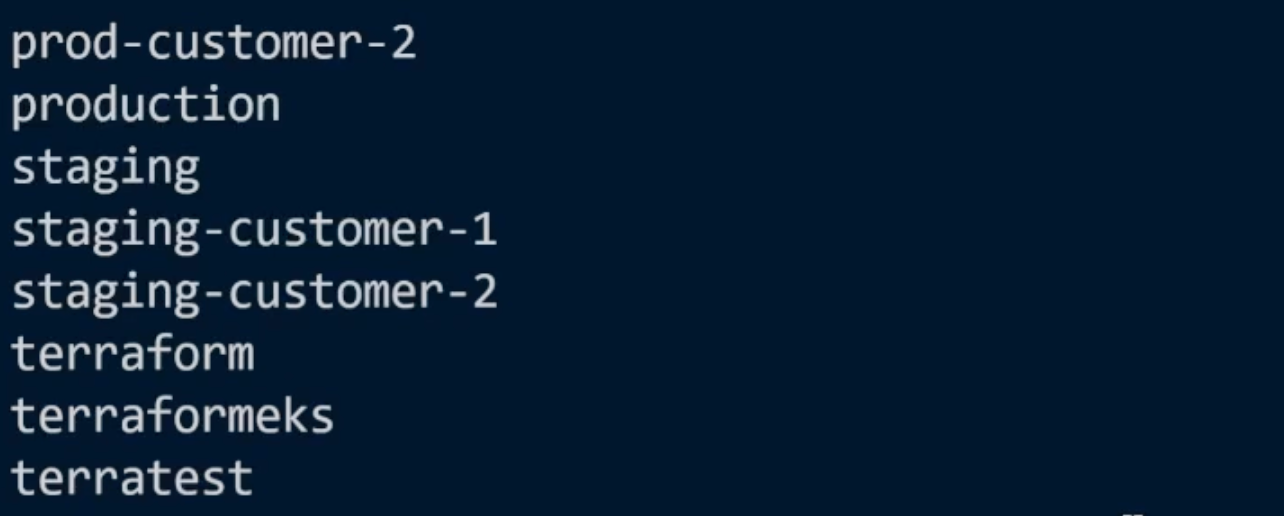
Once you run the container, you'll see an output with the list of your CloudTruth projects. An example is below.

Wrapping Up
For many application developers and DevOps engineers, it's far easier to have a container to run workloads for you instead of running them on a server or on localhost that no other teammates can access. Instead of choosing a server or localhost, you can run CloudTruth commands inside of the smallest footprint, a Docker container.
Here's a screencast describing how to use CloudTruth CLI with Docker.
Our bite-sized newsletter with DevSecOps industry tips and security alerts to increase pipeline velocity and system security.