- Platform
- Why Us?
-
- Trusted by leading enterprise engineering teams.
- Enterprise-level support from config, IaC & cloud experts.
- Hosted on your platform or ours.
- Sync your config from anywhere.
- Our Team
- Our Mission
- News
-
- Trusted by leading enterprise engineering teams.
- Enterprise-level support from config, IaC & cloud experts.
- Hosted on your platform or ours.
- Sync your config from anywhere.
-
- Pricing
- Resources
- TruthTalk
Kubernetes Infrastructure as Code
Managing Kubernetes Manifests with cdk8s
November 11, 2022
What does it mean to create a Kubernetes Manifest? At a high level, you define in a declarative fashion what you want your containerized application to look like. Typically, this is done with YAML or JSON.
As tools progress and needs change, there are new ways. One of the new ways to create a Kubernetes Manifest is by using a general-purpose programming language. A tool you can use to do that, amongst many others, is a Cloud Development Kit (CDK).
In this blog post, you'll learn about the CDK for Kubernetes, how to install it, and how to utilize it with and without CloudTruth.
Managing Kubernetes Manifest with cdk8s
There have been a few transitions throughout creating Infrastructure-as-Code or other pieces of code that weren't exactly considered application code but still wanted to follow the same practices as application code. Things like using a general-purpose programming language, writing unit tests, scanning the code with tools like SonarQube from a security perspective, and a lot of general programming best practices.
When you dive into tools like Terraform and Ansible, it's code, but it's not a general-purpose programming language. Because of that, there are programming-related best practices that you can use, but you can't use things like a TypeScript testing module because the Terraform/Ansible code is written in HCL and YAML.
Because of that, Cloud Development Kits started to come to light, and there are a few now. HashiCorp and AWS have a CDK. Pulumi itself is essentially a CDK. With Kubernetes, there's also a specific CDK. It's called the cdk8s.
The cdk8s works like any other CDK. The only difference is with other CDKs, you can create resources outside of Kubernetes. With the cdk8s, it's Kubernetes-centric, which is a good thing as it has a focus point.
Installation
Now that you know what the cdk8s is let's learn how to install it.
First, the installation method is going to depend on your operating system. If you're using macOS, you can install cdk8s with Brew.
brew install cdk8s
If not, you can use NPM, the JavaScript package manager, to install cdk8s.
npm install -g cdk8s-cliFor more installation methods, if/when they exist, you can check out this link: https://cdk8s.io/docs/latest/getting-started/
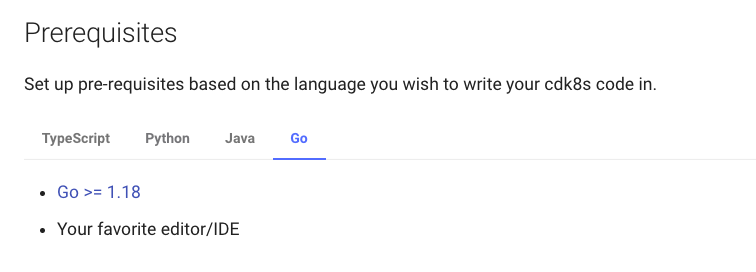
As you can see from the below screenshot, cdk8s supports:
- TypeScript
- Python
- Java
- Go
For the purposes of this blog post, you'll use Go. If you don't know Go, that's okay as all the code you need will be shown to you.
CloudTruth Setup
Before utilizing CloudTruth in the cdk8s, you'll need to set up a few components within CloudTruth so you can specify parameters/configuration data that will be passed into the cdk8s project.
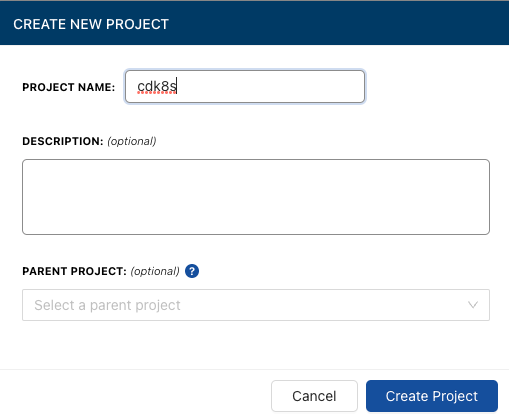
First, create a new project called cdk8s.
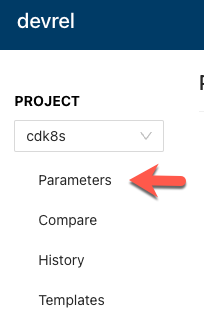
Next, within the cdk8s project, go to the Parameters.
Create five new parameters:
- containerImage
- containerName
- deploymentName
- port
- replicaCount
You can use the same values as below for the environment values.
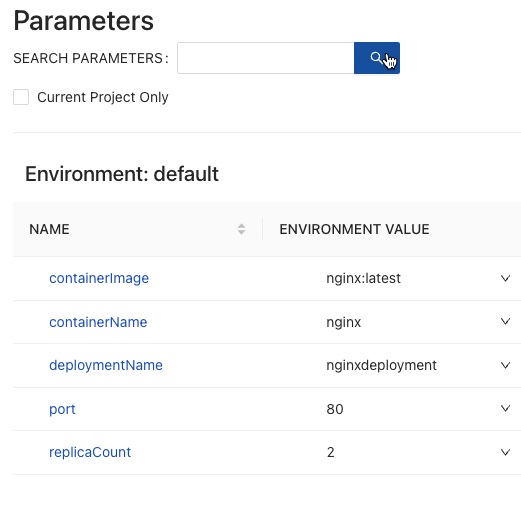
Now that CloudTruth is configured let's first take a look at writing the code and deploying without CloudTruth. Then, we'll see the same type of code, but with CloudTruth, so you can see how it makes it easier to manage configuration data.
Code Configuration (without CloudTruth)
Now that the installation of cdk8s is complete let's build a project.
First, create a new directory called nginxdeployment
cd into the nginxdeployment directory.
Initialize a new application with the command below indicating that you're creating a Go app.
cdk8s init go-appNow that the package is prepared, you can update the code. Open up the main.go file within the nginxdeployment directory.
If you look at the Go code, you're going to see a template. You'll also see a section that says define resources here.

Paste in the following where it says define resources here. The code that you see below is creating a Kubernetes Manifest for an Nginx Deployment. As you can see, it specifies the ports, replicas, the container image used, and any labels needed, much like any other Kubernetes Manifest. The difference is you're writing it in Go.
nameLabel := "nginxdeployment"
label := map[string]*string{
    "app": &nameLabel,
}
k8s.NewKubeDeployment(chart, jsii.String(nameLabel), &k8s.KubeDeploymentProps{
    Spec: &k8s.DeploymentSpec{
        Replicas: jsii.Number(2),
        Selector: &k8s.LabelSelector{
            MatchLabels: &label,
        },
        Template: &k8s.PodTemplateSpec{
            Metadata: &k8s.ObjectMeta{
                Labels: &label,
            },
            Spec: &k8s.PodSpec{
                Containers: &[]*k8s.Container,
                }},
            },
        },
    },
})
Once the code is updated, you'll need to make some module changes. Out of the box, cdk8s creates the configuration with example.com/directoryname. You won't want to use the example.com in the real world, so you'll want to change that.
First, change the module name in the go.mod file to nginxdeployment

Because of the example.com name being used, most of the libraries inside of the nginxdeployment directory point to that location. Because of that, you'll have to remove example.com and replace it with nginxdeployment.
For example, as you can see from the screenshot below, there's a cdk8s project called test, but it starts with example.com in a lot of the library. You can replace it in VS Code.
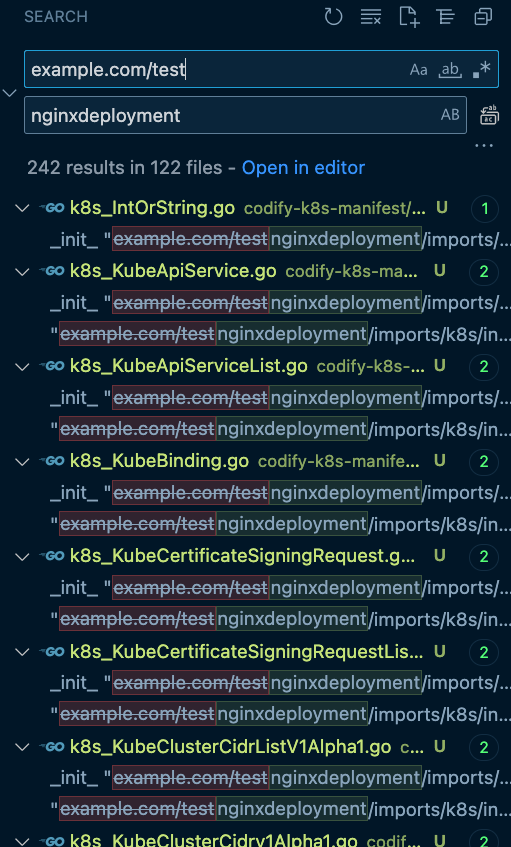
Replace everything in the package to point to nginxdeployment instead of example.com/nginxdeployment
Next, clean up the module cache.
go clean -modcacheTidy up the module to bring down all needed packages.
go mod tidyOnce all of that is complete, you can synthesize your Go app.
cdk8s synthIf you open the directory, you'll see a Kubernetes Deployment Manifest.

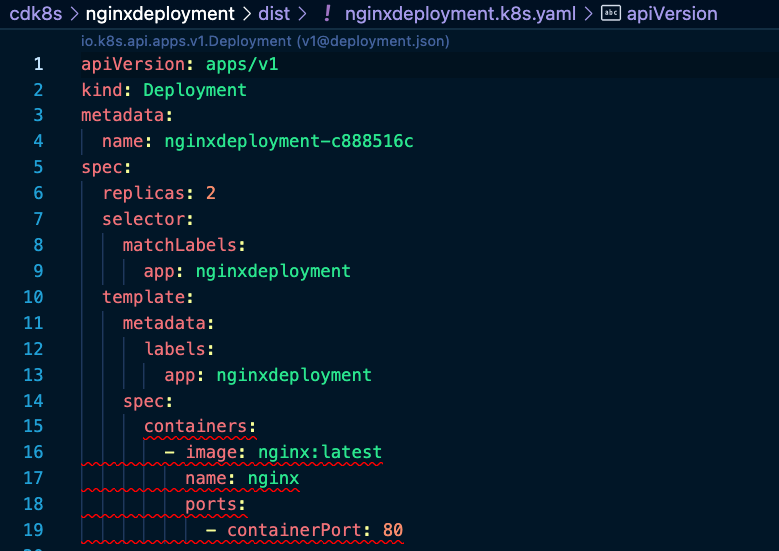
To deploy it, run the following.
kubectl apply -f dist/nginxdeployment.k8s.yamlCode Configuration (with CloudTruth)
As you saw in the previous section, there's a lot of configuration data that you needed to pass in which included:
- Ports
- Deployment name
- Replica count
- Container name
- Container image name
That's not only a lot of data you must remember, but that data needs to be stored somewhere. Suppose it's hardcoded inside the Go code. In that case, that means that it is no longer reusable for something like creating Kubernetes Manifests, which is one of the most significant intentions of Infrastructure-as-Code.
In this section, let's see how to configure the same code above with CloudTruth.
The most significant change for CloudTruth is that you will utilize Go's method of retrieving environment variables because that's how CloudTruth retrieves parameters.
Notice how in the code below (which you can copy, and it'll work), the CloudTruth parameters that you set up in the CloudTruth Setup section now exist inside of the os.Getenv() function.
Copy the code below and replace it with the code you created in the previous section.
replica, _ := strconv.ParseFloat(os.Getenv("replicaCount"), 64)
port, _ := strconv.ParseFloat(os.Getenv("port"), 64)
k8s.NewKubeDeployment(chart, jsii.String(os.Getenv("deploymentName")), &k8s.KubeDeploymentProps{
    Spec: &k8s.DeploymentSpec{
        Replicas: jsii.Number(replica),
        Selector: &k8s.LabelSelector{
            MatchLabels: &label,
        },
        Template: &k8s.PodTemplateSpec{
            Metadata: &k8s.ObjectMeta{
                Labels: &label,
            },
            Spec: &k8s.PodSpec{
                Containers: &[]*k8s.Container,
                }},
            },
        },
    },
})
Next, on the command line, use the CloudTruth CLI to specify the cdk8s project and run the cdk8s synth command retrieving the parameters from CloudTruth.
cloudtruth --project "cdk8s" --env development run -- cdk8s synthYou'll see an output similar to the screenshot below.

If you open up the nginxdeployment.k8s.yaml configuration, you'll see that the parameters were pulled from CloudTruth.

Here's a screencast describing the above instructions:
Tag(s): Kubernetes, Infrastructure as Code
Join ‘The Pipeline’
Our bite-sized newsletter with DevSecOps industry tips and security alerts to increase pipeline velocity and system security.
Continue exploring
Continue Reading

